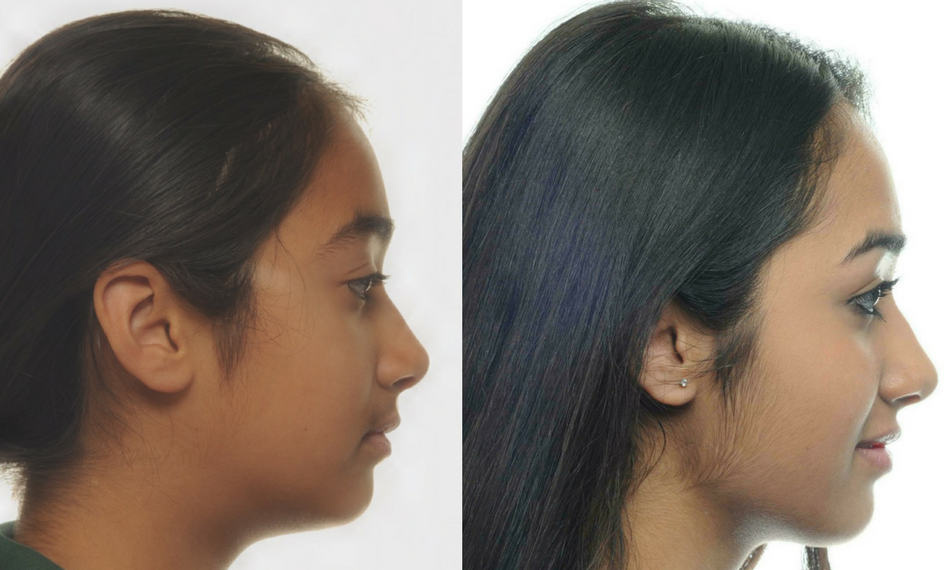
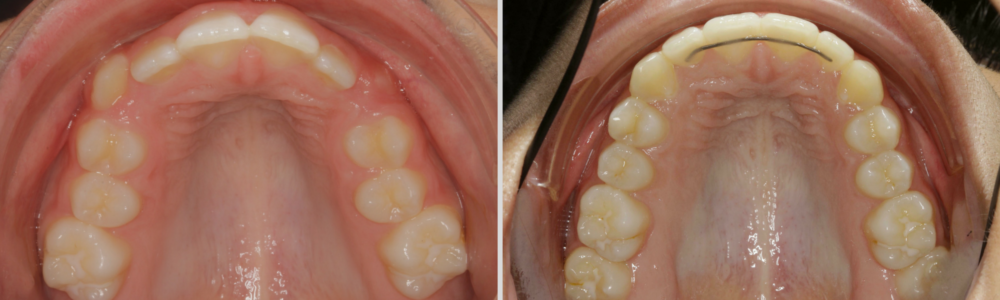
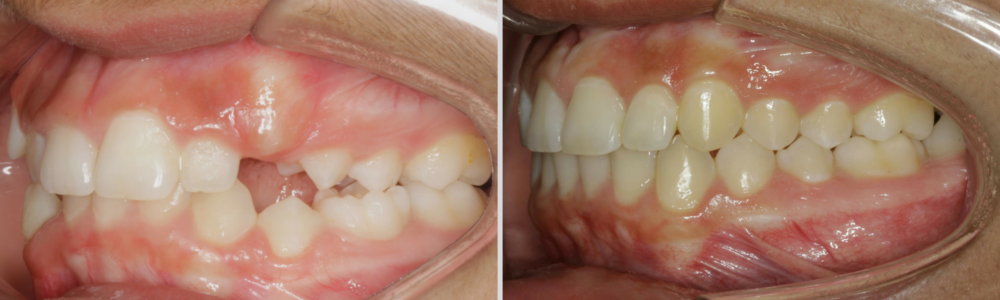
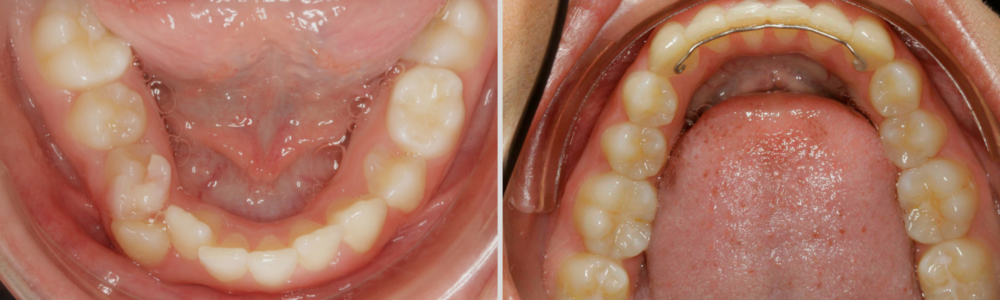
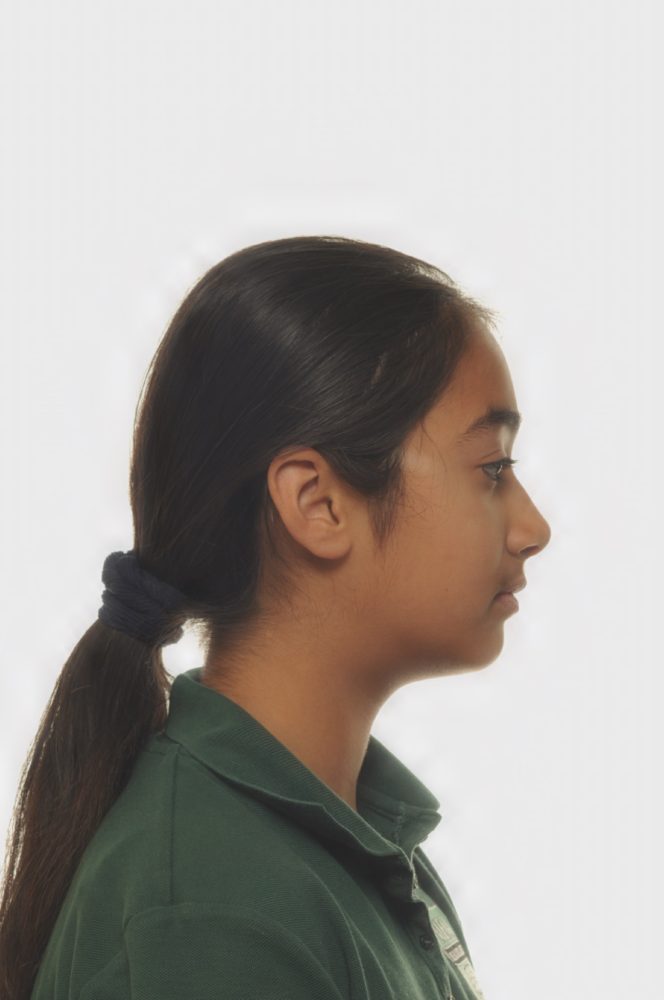
- Initial Exam
- Phase II Exam
- Initial Setup
- Initial Setup- Phase II
- Month 2
- Month 4
- Month 6
- Month 12
- Month 16- Phase I Debond
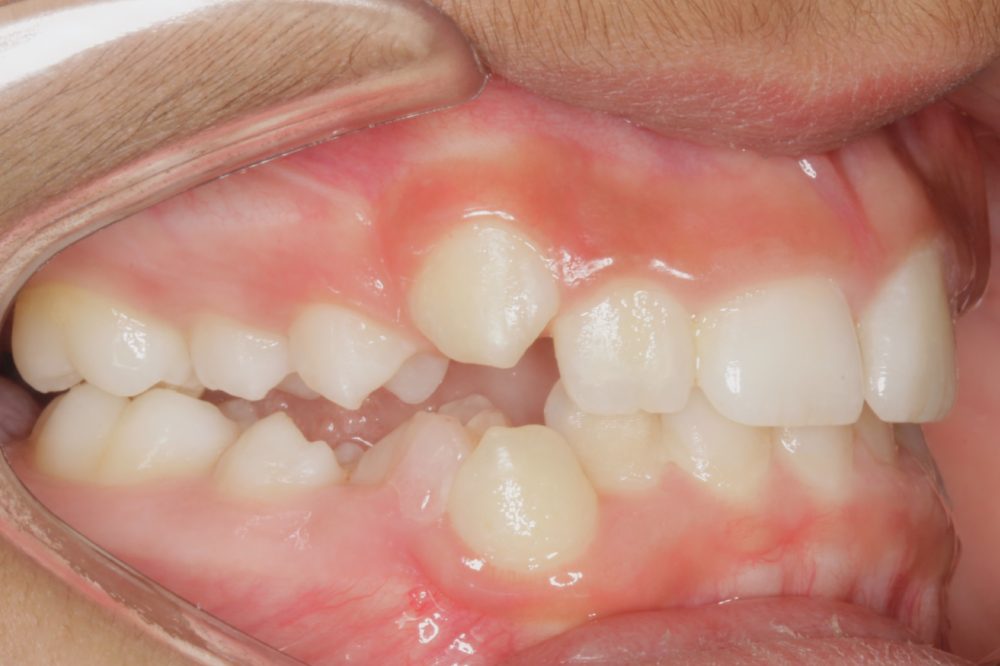
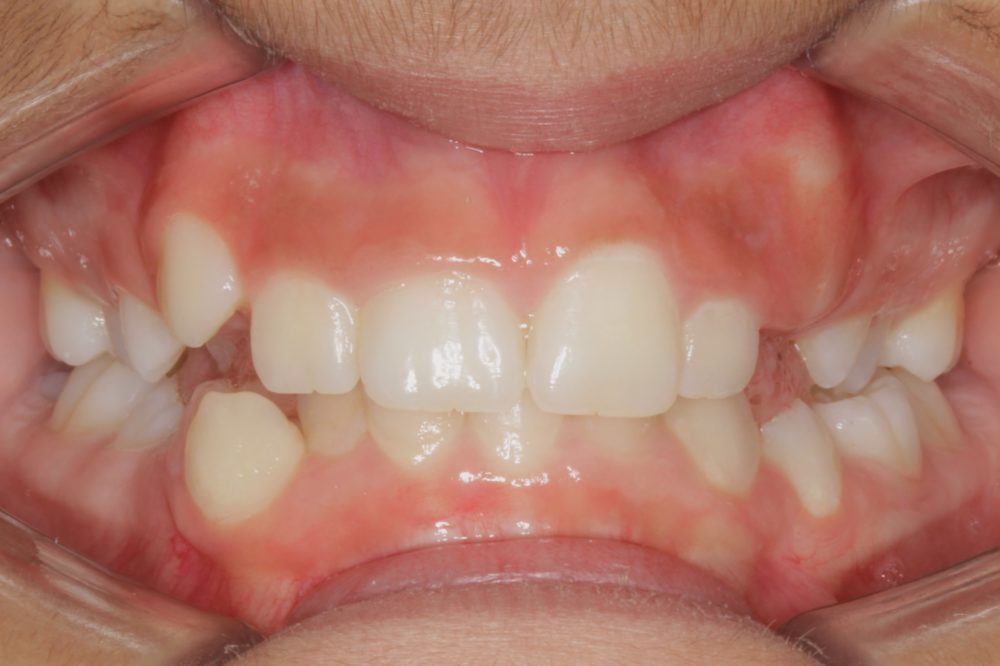
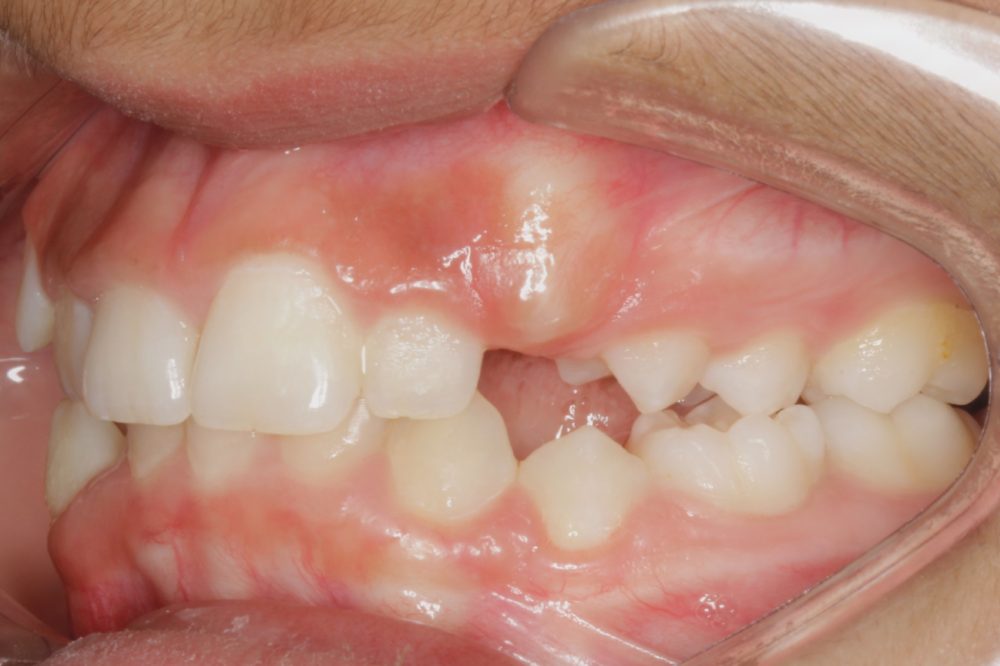
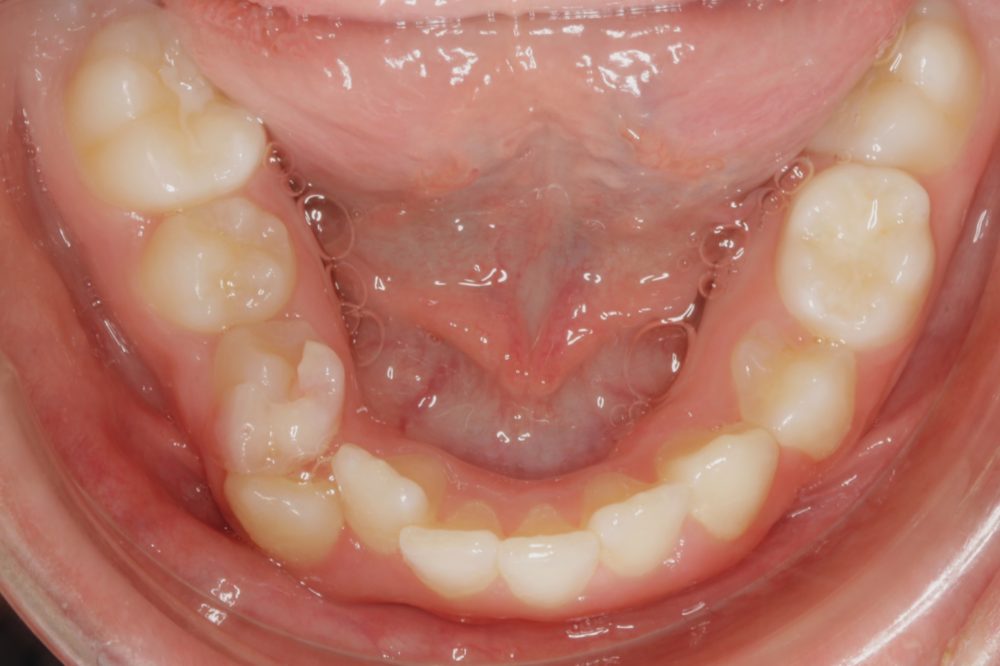
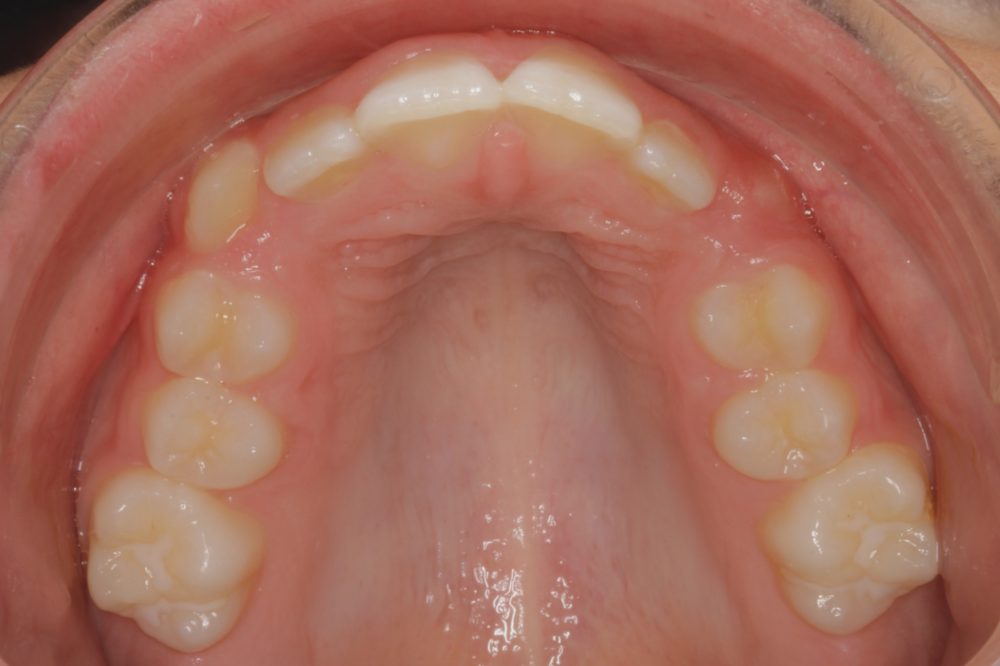
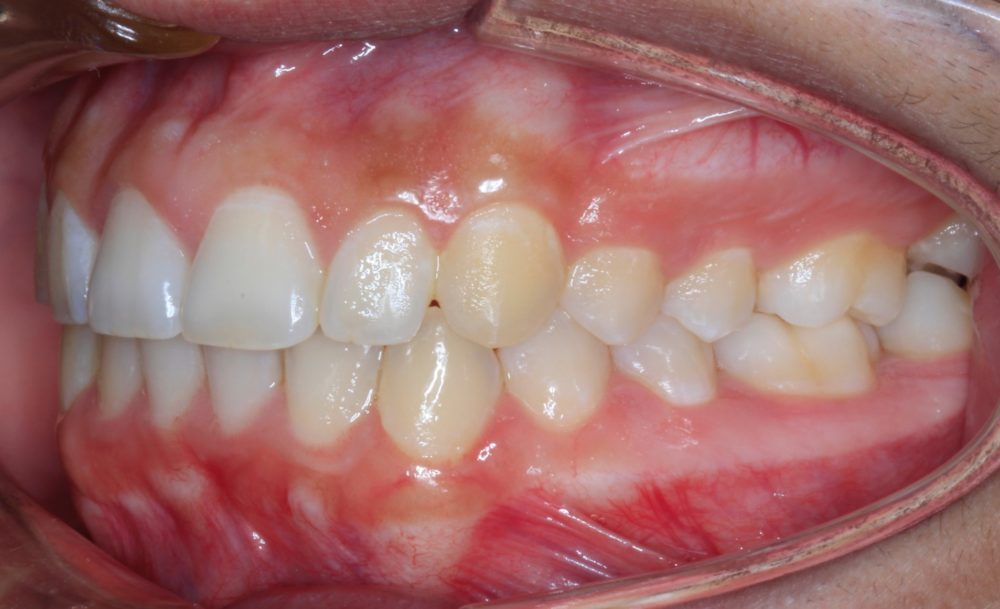
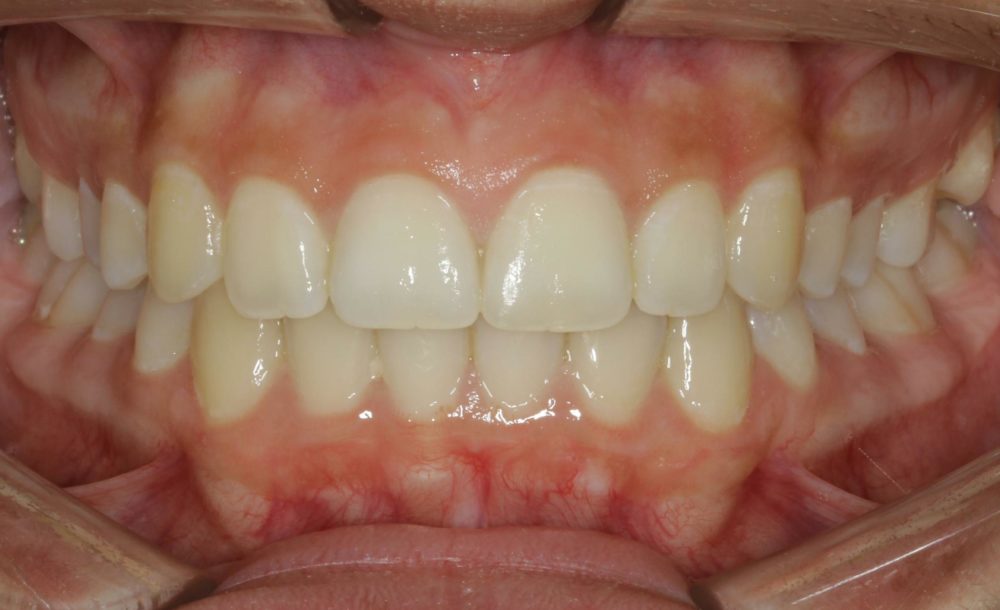
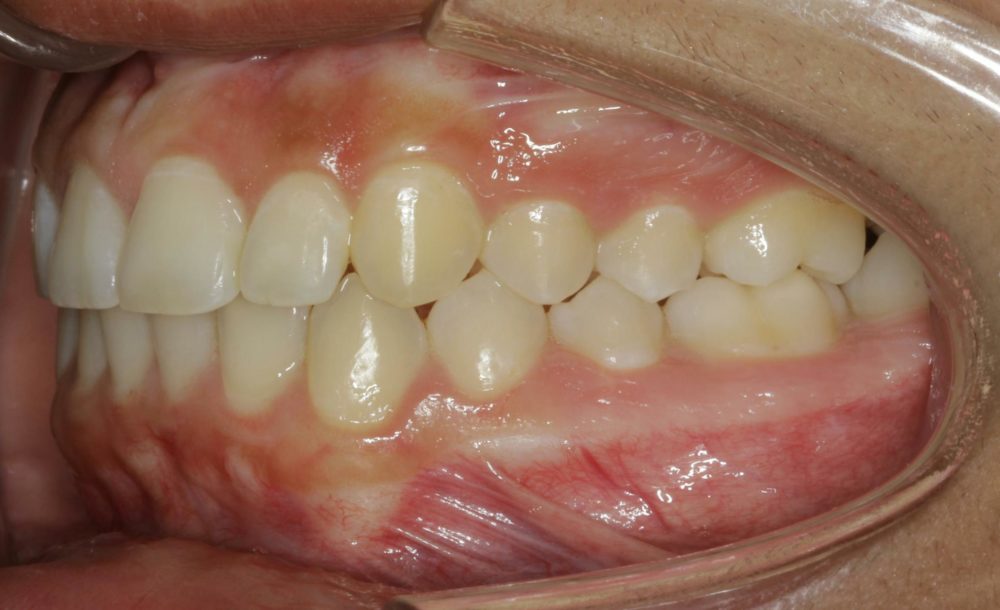
Inital Exam


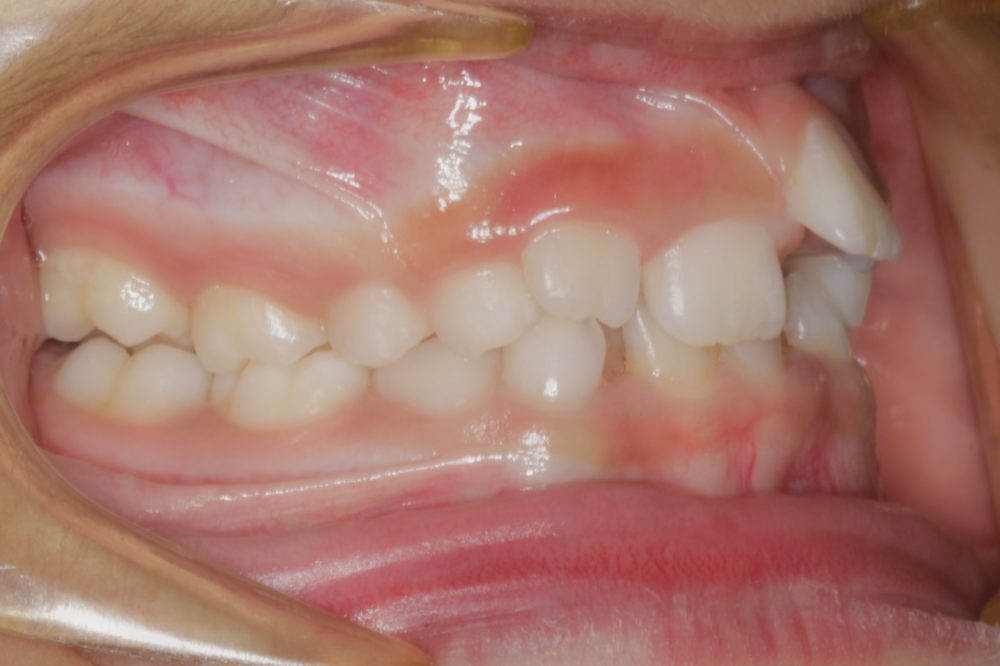
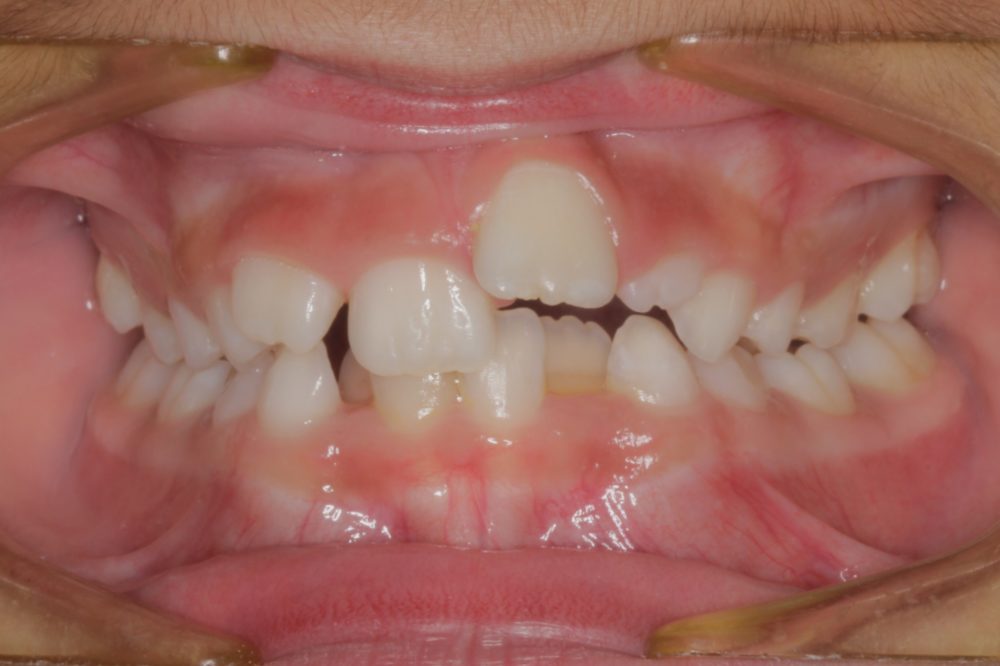

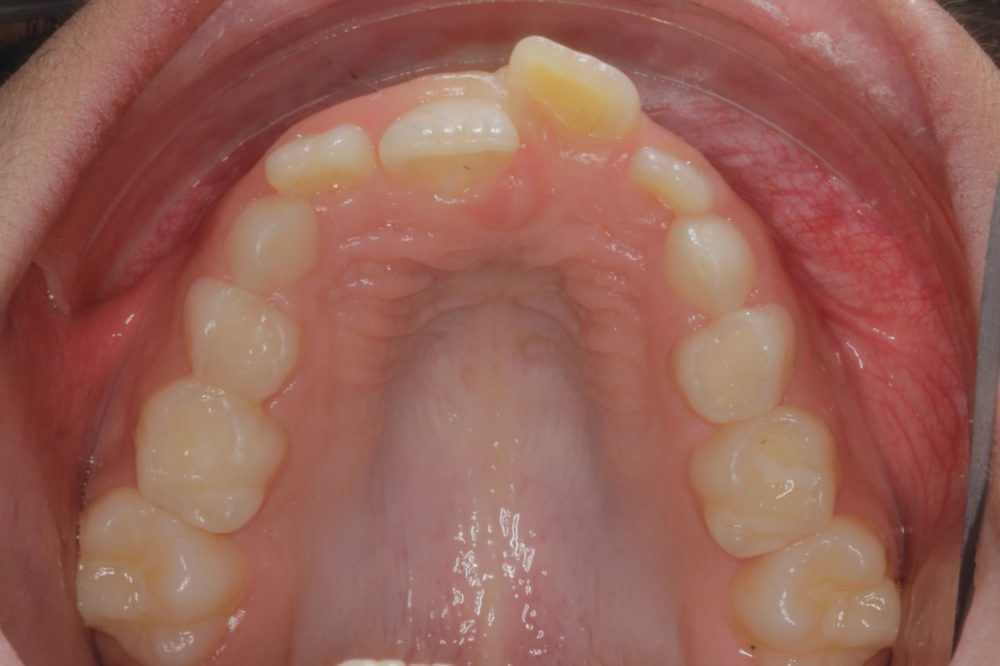
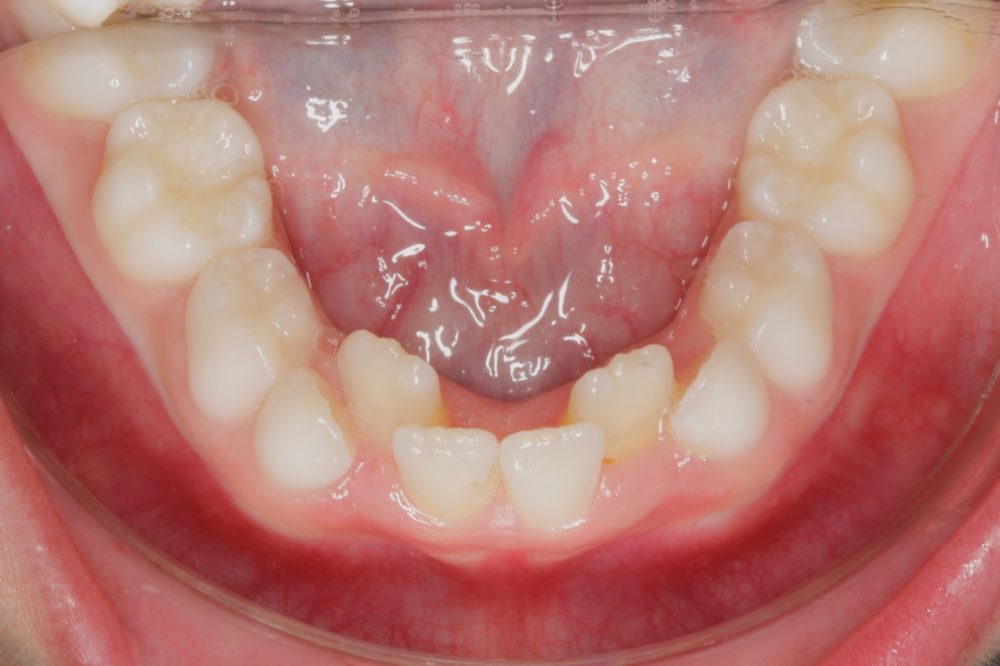
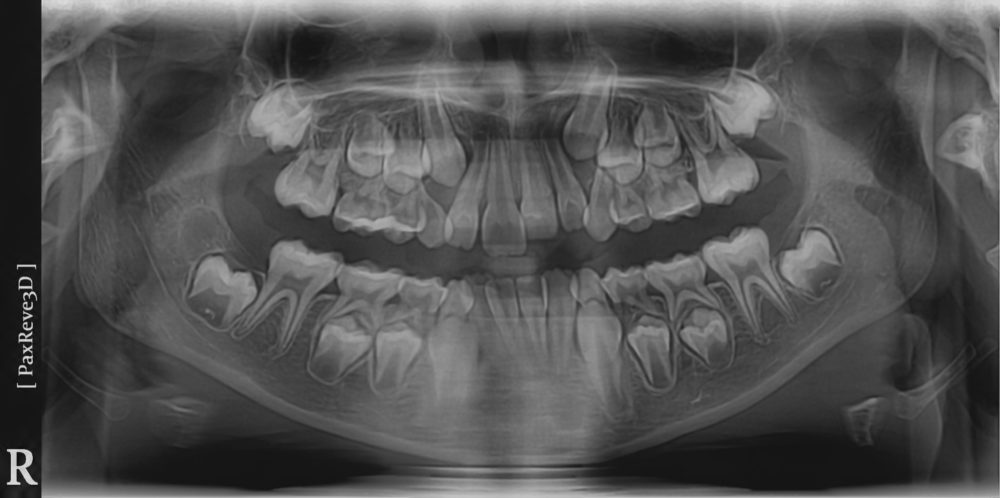
Chief Complaints
- Benson can’t close his lips.
- He has a hard time chewing his food.
- He doesn’t like to smile because he is embarrassed of his teeth.
- Judging by looks, it seems like Benson might have developmental problems. This is not the case. He is a very sharp kid who is smart and articulate.
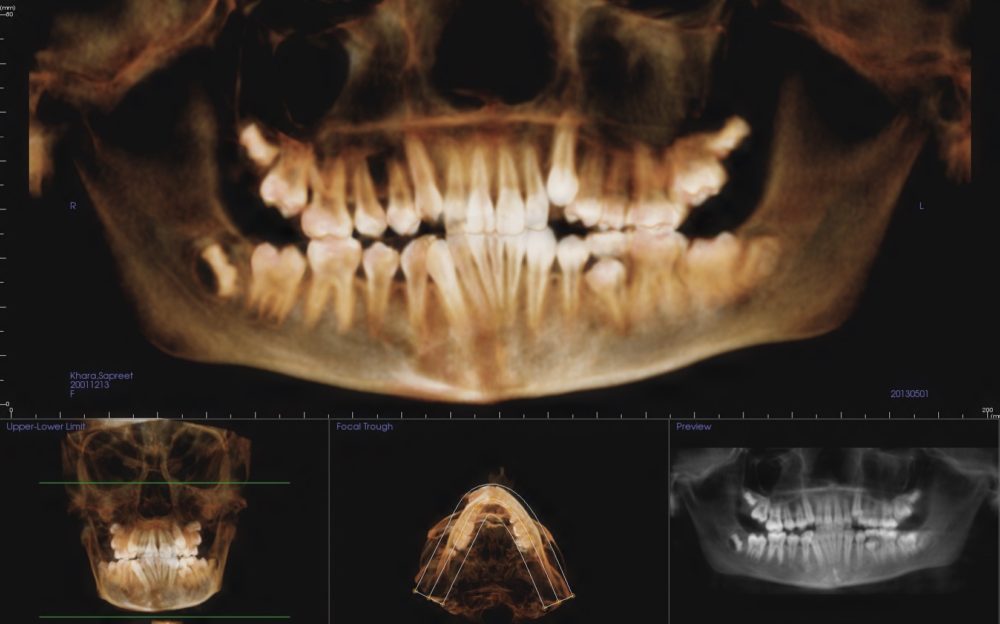
Diagnosis
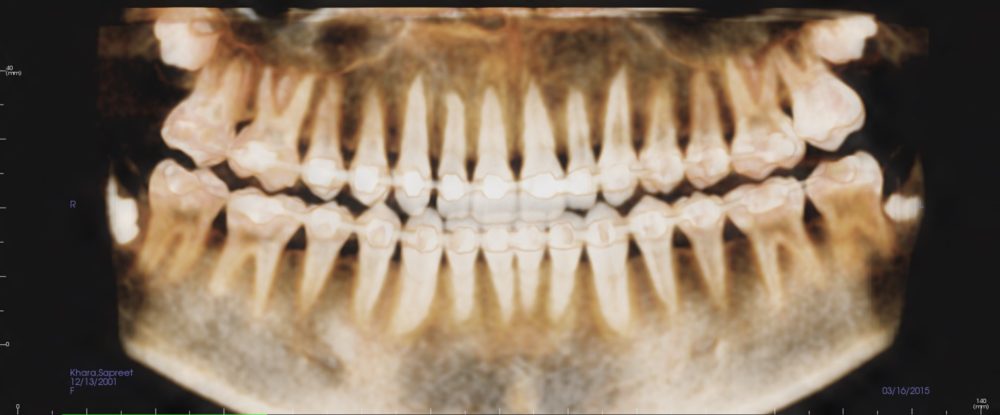
- Mandibular Asymmetry
- Bi-lateral Crossbite
- Severe Class III
- Tongue Thrust Issues
- Anterior Open Bite
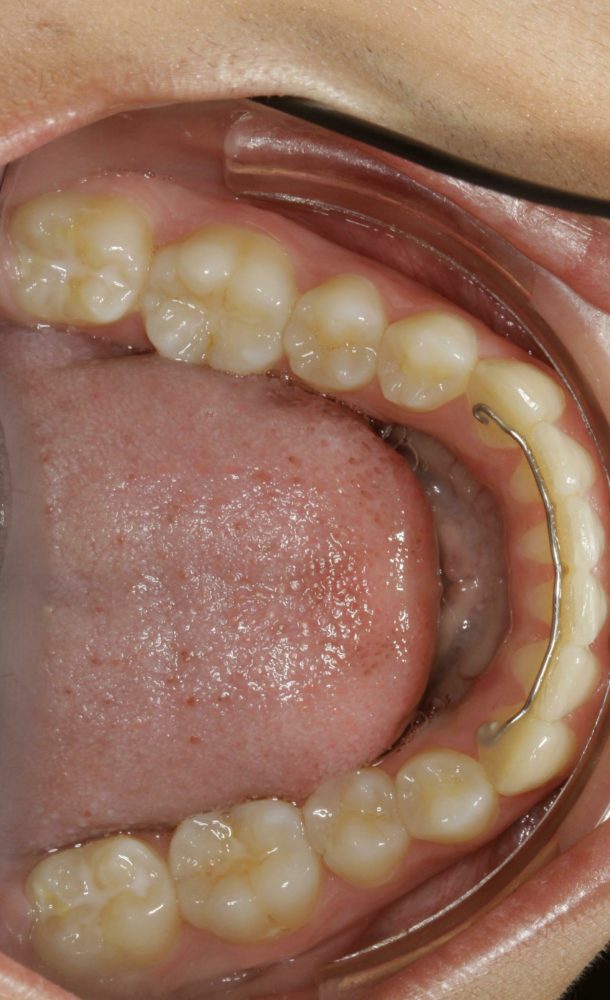
Treatment Plan
- Variable Torque Bracket Selection
- Use Tongue Tamers to influence a normal swallowing pattern, keeping it from pushing on the teeth.
- Once we place SS wires, have the 8’s extracted and place two Buccal Shelf TADs to retract the lower arch
Inital Exam


Chief Complaints
- Benson can’t close his lips.
- He has a hard time chewing his food.
- He doesn’t like to smile because he is embarrassed of his teeth.
- Judging by looks, it seems like Benson might have developmental problems. This is not the case. He is a very sharp kid who is smart and articulate.
Diagnosis
- Mandibular Asymmetry
- Bi-lateral Crossbite
- Severe Class III
- Tongue Thrust Issues
- Anterior Open Bite
Treatment Plan
- Variable Torque Bracket Selection
- Use Tongue Tamers to influence a normal swallowing pattern, keeping it from pushing on the teeth.
- Once we place SS wires, have the 8’s extracted and place two Buccal Shelf TADs to retract the lower arch
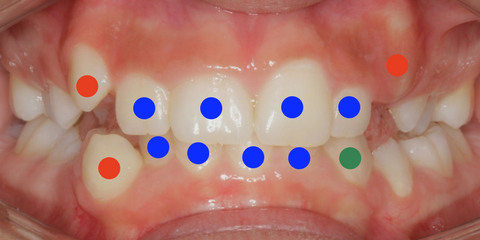
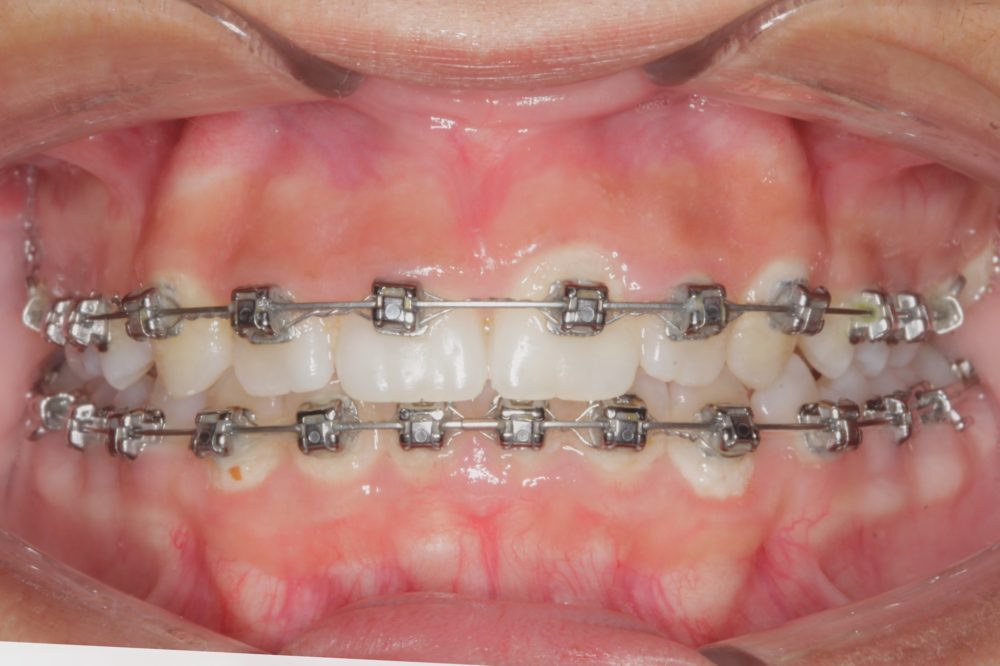
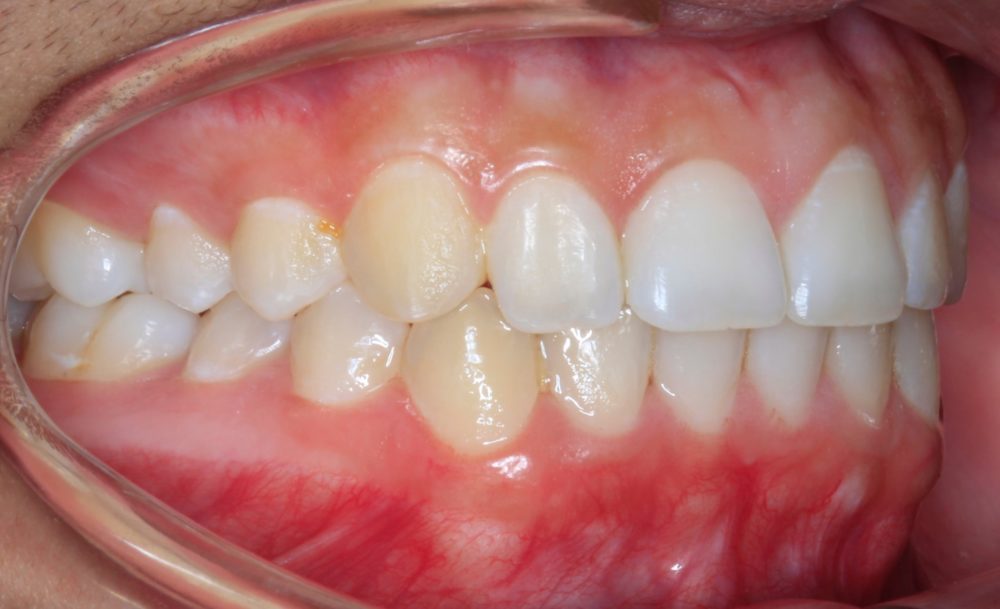
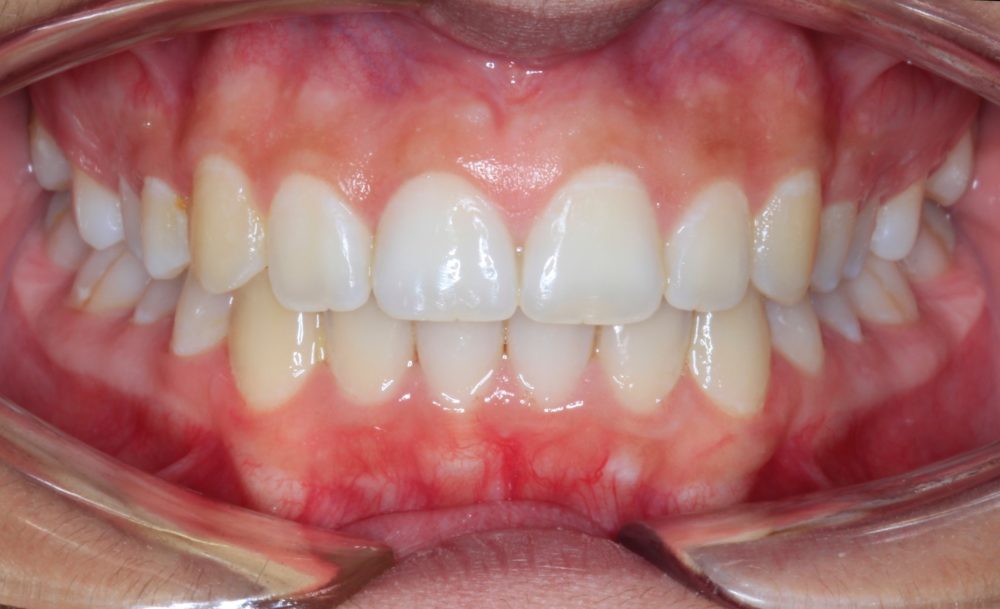
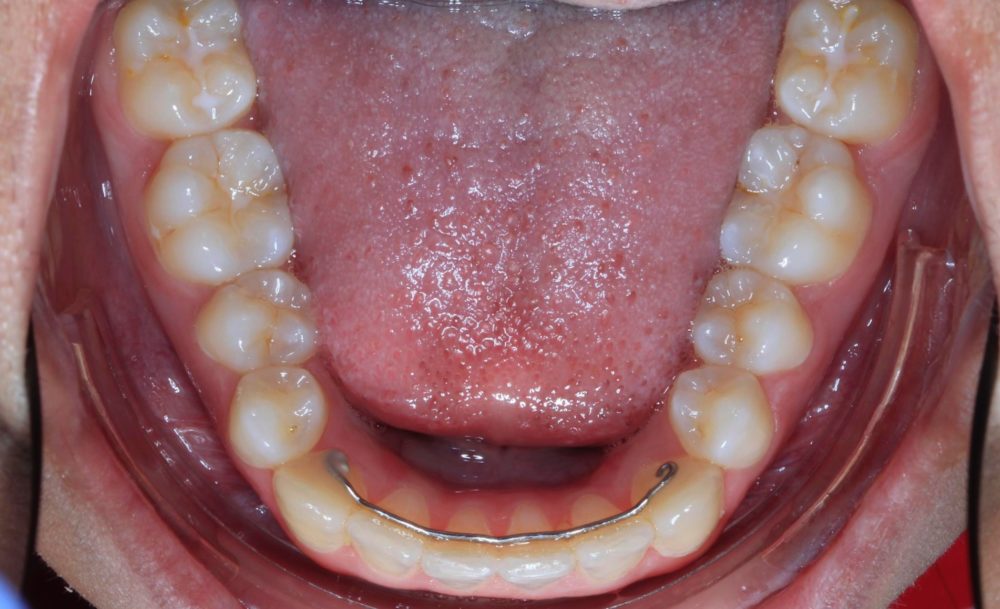
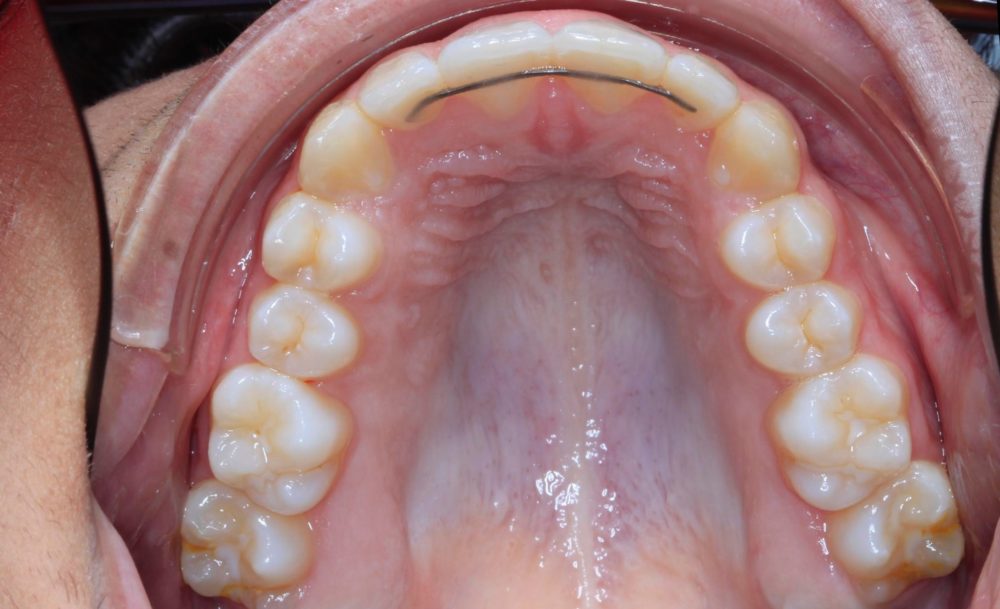
Torque Selection
Upper
- High Torque Upper 3’s
- They look pretty dumped in.
- Regular Torque upper 2-2
Lower
- Regular torque Lower 2-2
- LL3 Low Torque
- LR3 High Torque

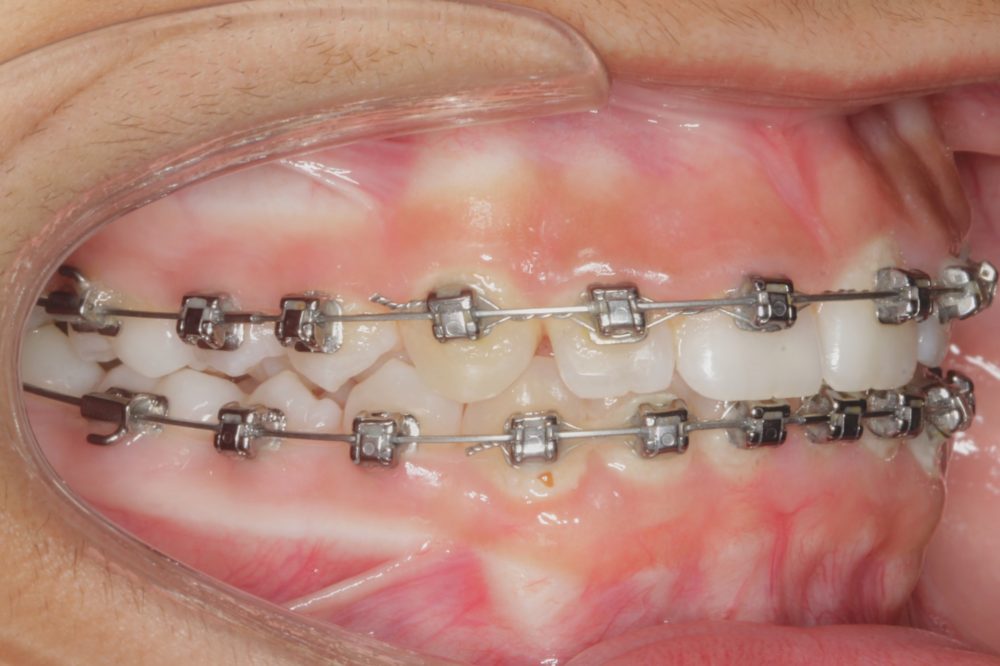
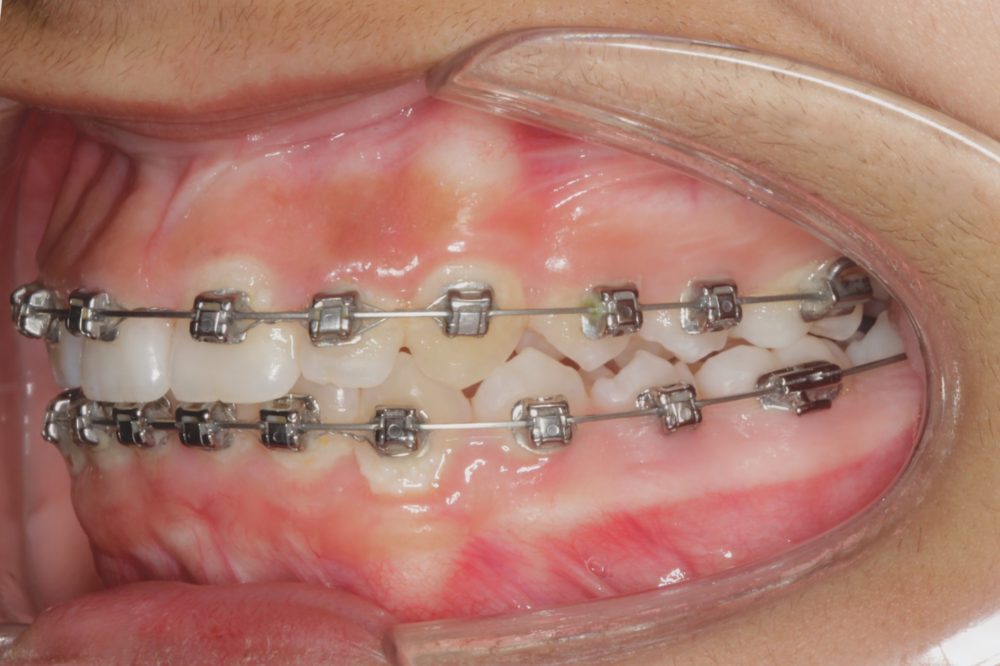
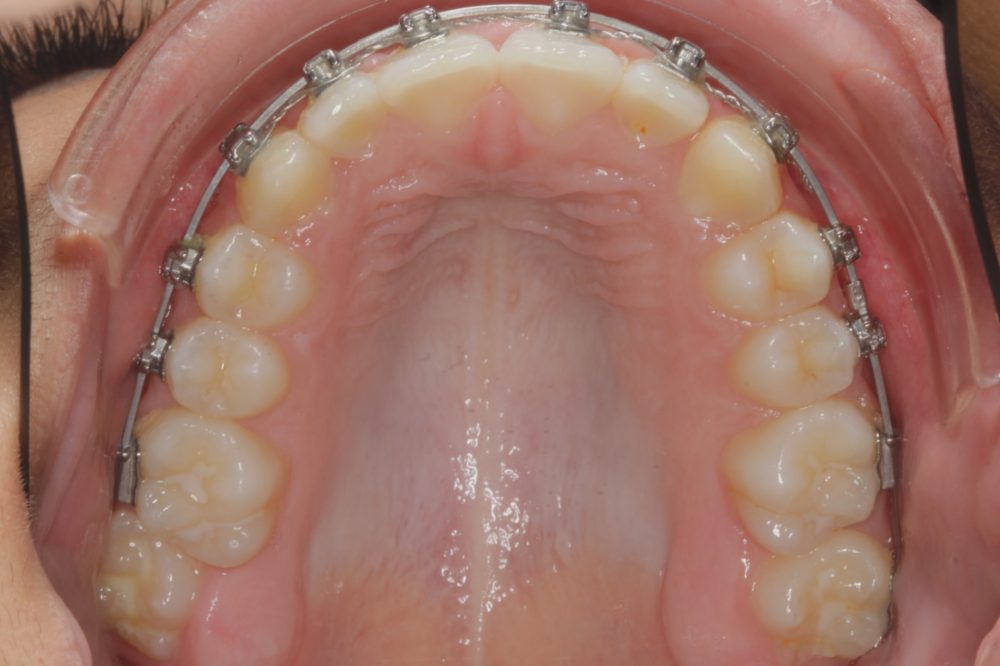
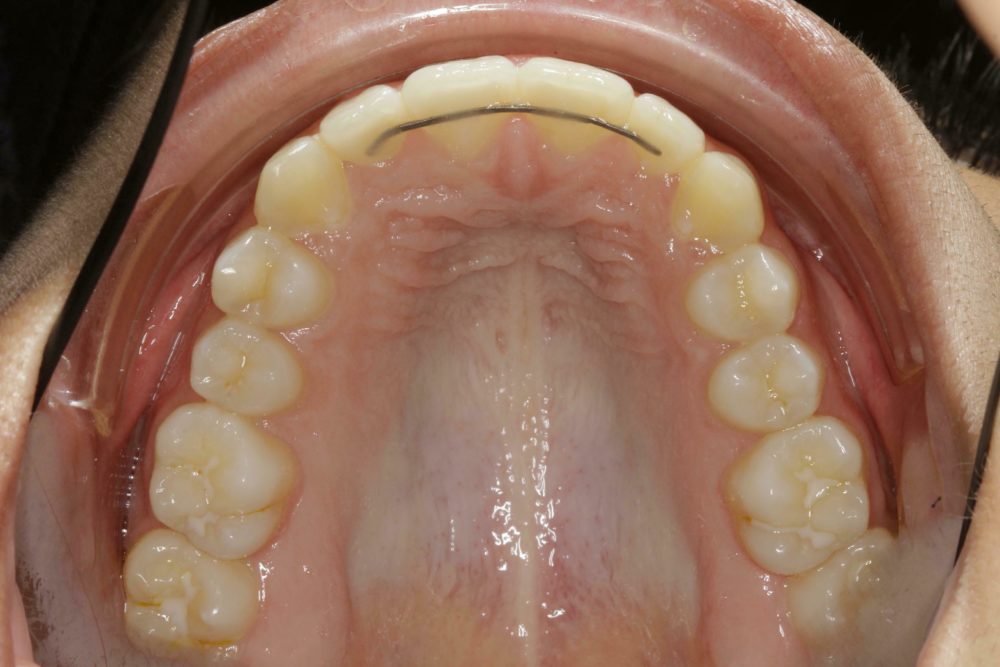
Initial Setup
- I’ve placed tongue tamers Upper and Lower 2-2.
- Initial wires are .014 CuNi
- Notice I placed a stop in between the upper 1s to keep the wire from traveling too far and poking the patient.
- I’ve clipped the lower wire distal to the 5s and placed a little composite to keep the wire from sliding out of the slot. (It would have also been fine to place a stop in between the lower 1s like we did on the upper.
- I chose to hold off on any type of elastics and just let the wires do the work.
Torque Selection
Upper
- High Torque Upper 3’s
- They look pretty dumped in.
- Regular Torque upper 2-2
Lower
- Regular torque Lower 2-2
- LL3 Low Torque
- LR3 High Torque
Treatment Progression
Month 2
Wire Progression
Upper: .018 CuNi
Lower: .016 CuNi
Comments
We also placed stops to keep the wire from moving too much.
Month 4
Wire Progression
Upper:.018 CuNi
Lower: .018 CuNi
Bracket Repo
Came in with broken brackets on Upper Right 2 and Upper right 6. We rebonded.
We also bonded Upper Left 3 with a high torque bracket
Month 6
Wire Progression
Upper: 14×25 CuNi
Lower: 14×25 CuNi
Bracket Repo:
UL3 (same torque)
Comments
Wire tie on the Lower
Month 12
Wire Progression
Upper: 14×25 CuNi
Lower: 14×25 CuNi
Comments
Wire Tie Upper 3-3
Wire Tie Lower 3-3
Month 16 – Phase I Debond
Wire Progression
Upper: 19×25 PT
Lower: 19×25 PT
Bracket Repo:
was in 19X25 PT For 2 Months before debond


Month 2
Wires
Upper: .018 CuTi
Lower: .016 CuTi
Brackets
Bonded L5’s and UL6
Month 4
Wire Progression
Upper: .014 CuNi
Lower: .018 CuNi
Brackets
Came in with UR2 and UR6 brackets off- Rebonded
Bonded UL3 with ah High Torque Bracket
Month 6
Wire Progression
Upper: .014 CuNiTi
Lower: 14×25 CuNiTi
Brackets
Repo’d UL3
Auxiliaries
Wire Tied the lower
Month 8
Wire Progression
Upper: 14×25 CuTi
Lower: 14×25 CuTi
Auxiliaries
Removed wire tie
Month 10
Wire Progression
Upper: .018 CuNi
Lower: .018 CuNi
Brackets
Repo’d Upper 3’s and UR1
Month 12
Wire Progression
Upper: 14×25 CuTi
Lower: 14×25 CuTi
Auxiliaries
Wire Tie U/L3-3
Month 15
Wire Progression
Upper: .014 CuNi
Lower: .018 CuNi
Brackets
Bonded U/L 7’s
Progress
Hightlights
Nothing Major happened for these 5 months. We kept everything tight with wire ties and went from the .014 CuTi/.018 CuTi into the 14×25 CuTi
Month 20
Wire Progression
Upper: 19×25 TMA
Lower: 17×25 TMA
Brackets
Repo’d upper 4’5 and 5’s and LR2
Elastics
cl 2 RS box LS w/ moose
Month 21
Wire Progression
Upper: 19×25 TMA
Lower: 17×25 TMA
Brackets
UR1 UR 5 and L 2’s
Steel tie LL2 where wire wouldn’t go in
Month 24
Auxiliaries
Power Chain Upper 6-6
Comments
Slenderized between the U1’s
Continued Elastics


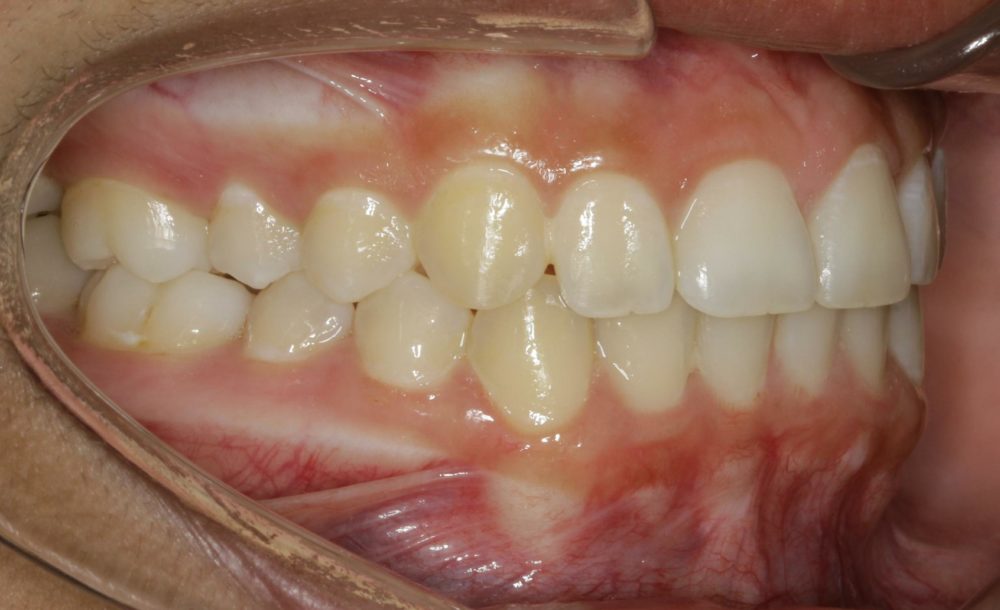
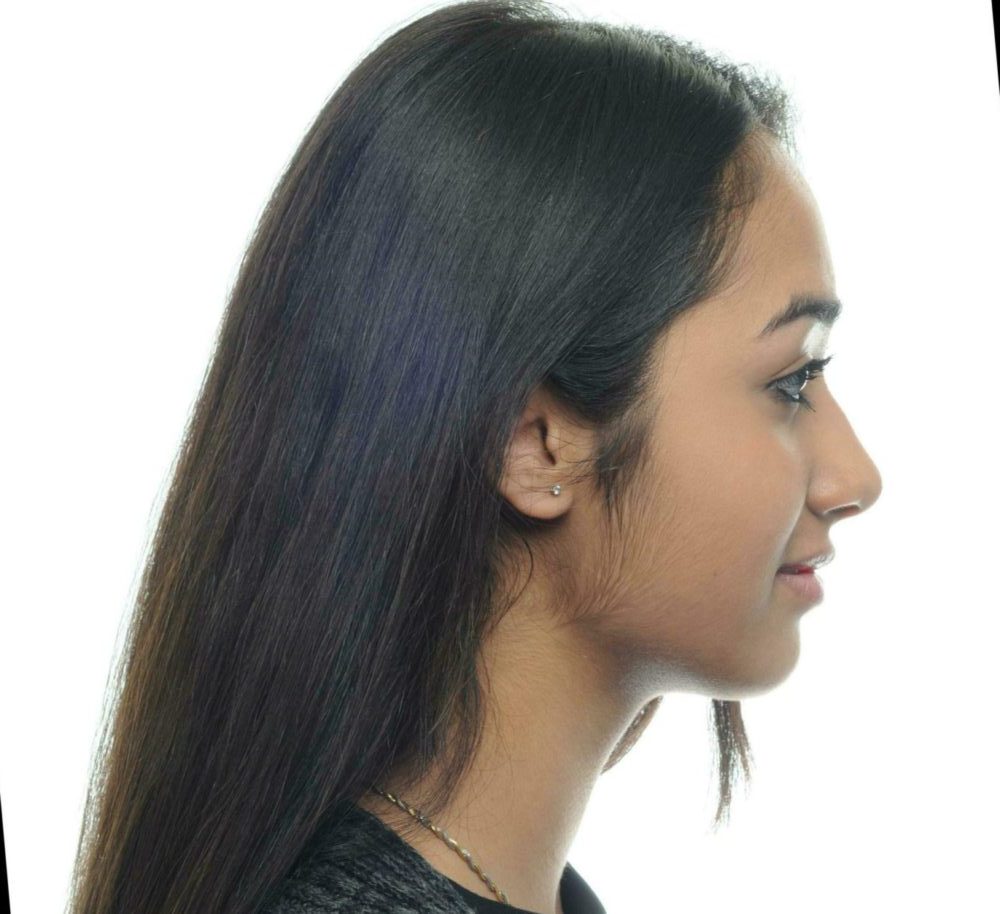
Before & After